Welcome to
On Feet Nation
Members
-
Prajakta Online
-
Helen Online
-
Christopher Online
-
Steven Online
-
Khalid Shaikh Online
-
manasi bandichode Online
-
Micheal Jorden Online
-
Larry Online
-
Jose Online
-
Donald Online
-
kashif seo Online
-
jack452 Online
Blog Posts
Sigmoidoscopes Market Size, Overview, Share and Forecast 2031
Posted by Prajakta on May 13, 2024 at 7:52am 0 Comments 0 Likes
FutureWise Research published a report that analyzes Sigmoidoscopes Market trends to predict the market's growth. The report begins with a description of the business environment and explains the commercial summary of the chain structure.… Continue
Top Content
What are the steps involved in repairing the transom of your boat?
Are you are about to repair your boat's transom? Not exactly sure how you are going to get the job done all by yourself? Well, repairing the transform is not at all a difficult task to do, specially if you have the right equipment with you. The various steps have been mentioned below:
Step 1: Dry the boat
Before you make any kind of preparations to repair the transom, it is very important for you to get the boat out of water and wipe it properly. This is going to provide you with easy access to the transom and the repairing activity can be done easily.
Step 2: Check the damage
Next you need to check the extent of damage. This is going to help you determine how exactly are you going to get the repairing done. If there is only a small hole, the repairing can be done really easily. However, if the transom is complete rotten, more drastic changes will have to be taken.
Step 3: Remove the damaged transom
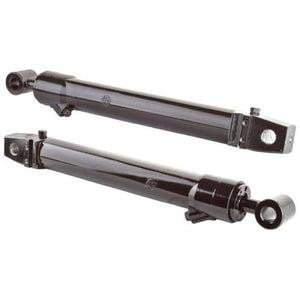
The next job is to remove the transom careful. You can make use of a hammer or a crowbar in order remove transom. You can also go for SEI Trim Cylinder repair for your boat.
Step 4: Remove the damaged area of the transom
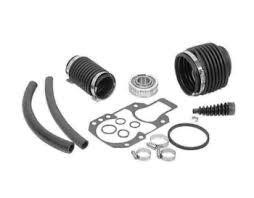
The next thing that you require to do is to remove the damaged area. First, mark the damaged parts and then removed them carefully. You can also get a transom repair kit for easy transom repair.
Step 5: Cut the new transom
Once the damaged area has been removed, it is time for you to make replacements for those areas. For that, you will have to cut the new transform. You will have to mark the areas in the new transom that has to be placed in the old transom and cut them accordingly.
Step 6: Add the fiberglass
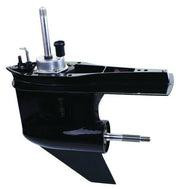
Once you are done cutting the new transom, it is time to add the fiberglass. This is going to help you in ensuring that the new transom fits the boat perfectly. You can also get Yamaha Complete Lower Units for your boat.
Step 7: Sand the edges
Now you can make use of a sandpaper in order to sand the edges of the transom. This will ensure that the plywood fits the boat perfectly.
Step 8: Install the new transom
Once the sanding process is over, it is time for you to install the new transom. Once the transom is perfectly place, you can fix it to the boat with adhesive.
So, for stern drive engineering and transom repair, you may get in touch with us and we will provide you the guidelines.
Source url:-https://linkgeanie.com/blogs/alpha-gen-2-transom---claussmarine-com
social media:-https://www.facebook.com/Claussmarinellc/
Views: 13
Comment
© 2024 Created by PH the vintage.
Powered by
![]()
You need to be a member of On Feet Nation to add comments!
Join On Feet Nation