Welcome to
On Feet Nation
Members
-
Andrew Online
-
ramy Online
-
Thomas Shaw Online
-
basitkhatr6666 Online
-
Appsinvo Pvt Ltd Online
-
Sharon Online
Blog Posts
Top Content
How Are Solar Panels Fitted to The Roof
One of the inquiries that we are posed consistently is 'how are sun powered chargers fitted to the rooftop?'
We have assembled this post to give you a knowledge into the various sorts of fitting strategies and the bit by bit course of fitting sunlight powered chargers to a rooftop.
There are a couple mounting types that are normally utilized for fitting sun powered chargers to a homegrown property:
Straightforwardly onto the rooftop, where they sit near the rooftop tiles to accomplish a position of safety appearance and are mounted on to aluminum sections (a mounting that we suggest and that we will cover underneath).
Incorporated into the actual rooftop, where the sunlight powered chargers will straightforwardly supplant a portion of the rooftop tiles (famous with new form houses).
They are mounted on A-outline where they can be situated on a level rooftop or in the nursery.
The methods and cycle of the sunlight based charger establishment especially rely upon your rooftop type as all rooftops aren't made something very similar, but since the regular tiled rooftop is ordinarily the most well known sort, we will show the establishment interaction on that.
The bit by bit establishment process: Solar Panel
The following is the bit by bit establishment cycle of a sunlight based charger establishment in Nottingham that was finished for a client last end of the week.
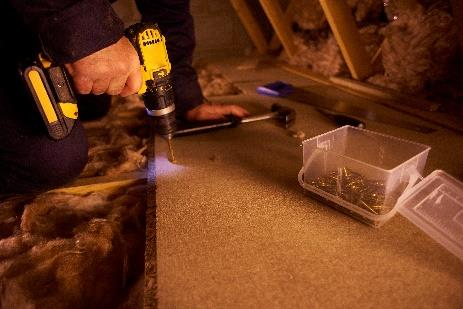
Stage 1
The primary phase of the establishment interaction includes cautiously eliminating chosen tiles from the rooftop so we can find the rooftop rafters.
Stage 2
When the rooftop rafters have been found, we can then get rooftop secures/sections that are great for this sort of rooftop to them. This progression is rehashed until generally getting secures are set up.
Stage 3
The tiles eliminated in Step 1 are then supplanted into their unique position. Since there is no requirement for us to infiltrate the tiles in any capacity during establishment implies that the trustworthiness of the tile is kept up with; accordingly staying watertight.
Stage 4
Aluminum mounting rails on which the sunlight based chargers will sit are then gotten on to the rooftop secures, alongside the link passage which is completely waterproofed to guarantee that it is free from any danger.
Stage 5
The sun powered chargers are then securely gotten to the aluminum mounting rails until every one of the sunlight based chargers are completely introduced and associated with each other.
Stage 6
The inverter is associated with the boards and introduced in a reasonable area; for this situation, it has been introduced in the carport however is some of the time likewise situated in the space. The essential occupation of the inverter is to change over DC current provided by the boards to AC current, which can then be utilized to drive ordinary domestic devices.
The sun powered charger inverter additionally stores long stretches of significant information; this information can then be alluded to while checking the framework is proceeding as we would anticipate.
In any case, sunlight powered chargers should be maintained clean in control to work at their greatest effectiveness. Whenever you notice an abatement in how much power delivered by your sunlight based chargers, it is probable because of a development of soil and trash on their surfaces, for example, dust, plant sap, lichen and bird droppings. You can likewise employ sunlight powered charger cleaners to wash your sun powered chargers.
For More Info :-
Views: 0
Comment
© 2024 Created by PH the vintage.
Powered by
![]()
You need to be a member of On Feet Nation to add comments!
Join On Feet Nation